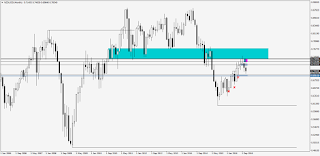
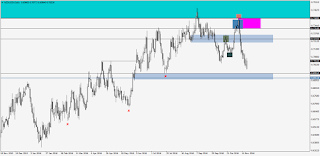
This week our main focus is on AUDCAD and NZDCAD. I also have H1 and D1 SR plotted on AUDUSD, EURUSD, GBPUSD, and USDJPY, so I'll try to keep track of LTF accumulation and distribution on those as well.
Here are the low downs on the main charts:
AUDCAD - planning to look for potential (NOT LIKELY) sells in the Butterfly C zone. Once through there, I will sell heavy in the Bat C zone and compound intraday on the way down, take some profit at PRZ and hopefully keep riding and compounding.
NZDCAD - planning to sell heavy in the Gartley C zone and compound intraday on the way down, take some profit at PRZ and hopefully keep riding and compounding.
That's it for the beginning of this week. I'll see how the majors start unfolding and post if I see anything enticing on them. Peace yo
Sunday, November 27, 2016
Monday, November 21, 2016
11/21/2016
Didn't think I would be doing much charting this week because not many opportunities usually present themselves around Thanksgiving but here are some:
NZDUSD - Sell at next -OB visit.
NZDCAD - Pretty much the same story but with (Daily) Gartley confluence.
AUDCAD - Same story but with Bat confluence. I am particularly fond of selling D1 Bat Cs on CAD :).
We'll see how these pan out.
NZDUSD - Sell at next -OB visit.
NZDCAD - Pretty much the same story but with (Daily) Gartley confluence.
AUDCAD - Same story but with Bat confluence. I am particularly fond of selling D1 Bat Cs on CAD :).
We'll see how these pan out.
Thursday, November 17, 2016
Week of 11/14/2016 Wrap Up (11/17/2016)
Squared off all of the positions I entered this week just after New York Open. Ended up with 203.10 pips from 5 positions in 4 pairs.
The winners:
The loser(s) (one bad trade with two positions):
The one that got away (thought it would go deeper into C, the way she goes):
All in all it was a good week. Satisfied with where I took profit (cut profit short of take profits because it's Thursday and I rarely hold through (and very rarely enter on) Fridays, and Thanksgiving is next week so it will take a lot to make me want to put a position on). Also very satisfied with where I cut my losses on CAD, thank you DJC for confirming my suspicion that CAD was going to rip everyone a new hole just in time to slip out.
Going to hone my edge next week in preparation to kill December and make 2017 my bitch.
Peace yo.
Tuesday, November 15, 2016
11/15/2016 - Update
Have entered some positions (using nothing fancy) based on charts posted earlier in the week. Here they are:
I also have a buy limit at the weekly +OB on EURUSD (within Cypher C) and am looking for a sell a little deeper in this Bat C:
I also have a buy limit at the weekly +OB on EURUSD (within Cypher C) and am looking for a sell a little deeper in this Bat C:
Monday, November 14, 2016
11/14/2016 - Update
Some EUR and NZD patterns have reached significant zones.
EUR buy zones:
EURUSD
EURAUD
EURCAD
EURCHF
NZD buy zones:
AUDNZD
NZDCAD
NZDCHF
NZDUSD
EUR buy zones:
EURUSD
EURAUD
EURCAD
EURCHF
NZD buy zones:
AUDNZD
NZDCAD
NZDCHF
NZDUSD
Sunday, November 13, 2016
Thursday, November 10, 2016
11/10/2016 Follow-up
Yo yo yo what's going on, just figured I'd add "after" pics to compliment the charts posted Yesterday. I do not trade Fridays so the next batch of charts for the 14th will be up sometime this weekend.
AUDCAD
AUDCHF
AUDJPY
AUDNZD AUDUSD
CADCHF
CADJPY
CHFJPY
EURAUD
USDCHF
As you can see, most of these (AUDCHF, AUDJPY H1, CADJPY, EURAUD) were invalidated rather quickly. The quality of these patterns was nonexistent in the wake of the election, because the anchor legs used on the ones that failed were moves exaggerated by the election and the fact that they were on the 1hr (not 4hr+ like I like) made them a recipe for failure.
From now on I'll keep the posts quality (no BS anchor legs) and above the H4 mark.
Subscribe to:
Comments (Atom)


